
Why Kitchen Remodeling Starts With How You Use the Space
Every kitchen renovation begins with understanding how you use your space. Before you select countertops or browse cabinet styles, consider who cooks in your kitchen, how often you host guests, where clutter accumulates, and which daily tasks feel awkward or inefficient.
A successful kitchen remodel connects design choices to how a homeowner cooks, gathers, works, and stores belongings every day. This guide walks through the planning, design, budgeting, construction, and decision-making process so you can approach your project with practical clarity.
Step 1: Define Your Kitchen Layout and Functional Goals
Your layout determines whether your new kitchen will support or frustrate your daily routine.
Common Kitchen Layouts
- Galley: Two parallel counters with a walkway between, efficient for small footprints and single cooks.
- L-shaped: Counters along two perpendicular walls, leaving space for a dining table or island.
- U-shaped: Three walls of cabinetry and counters, maximizing storage and work surfaces.
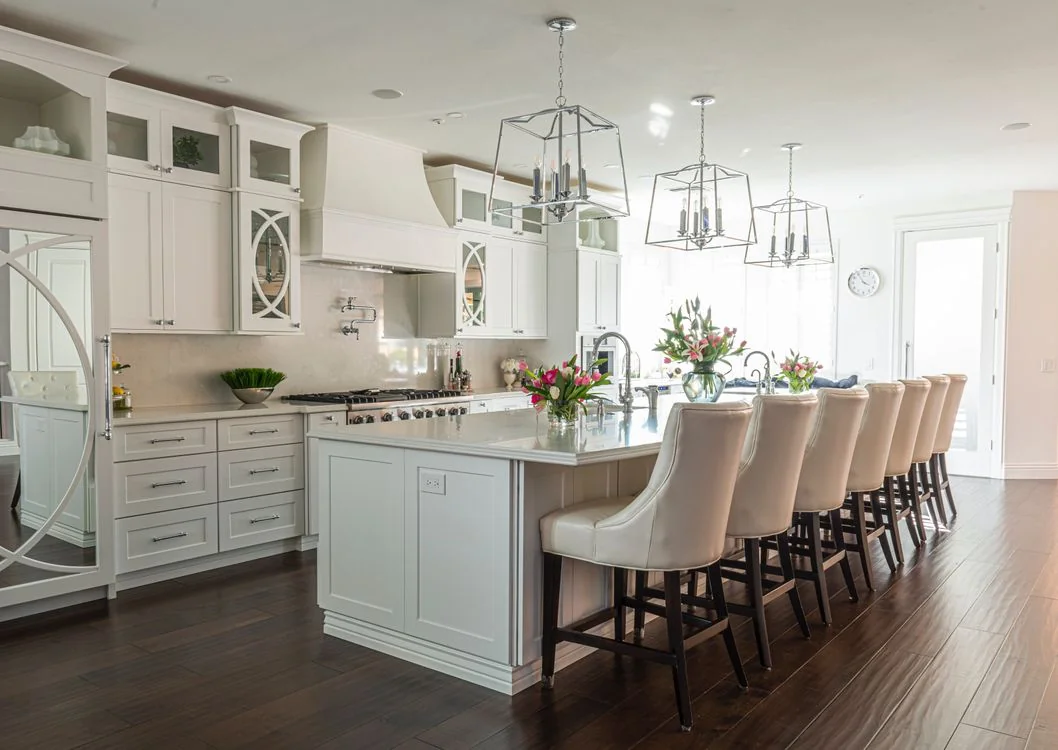
- Island or peninsula: Adds prep space, seating, and storage while defining the kitchen's boundary in an open floor plan.
- Open-concept integration: Removes walls to connect the kitchen with dining or living areas, improving sightlines and social flow.
Questions to Answer During Planning
- How many people cook at the same time?
- Do you need a dedicated baking station, coffee bar, or homework zone?
- Where do backpacks, mail, and daily clutter land?
- Will you entertain from the kitchen, and do you want guests to face the cook or the room?
- Do you need a pantry, and should it be a walk-in closet or floor-to-ceiling cabinets?
Answering these questions early helps your design team propose a layout that works better, not just one that looks better.
Step 2: Establish Your Budget and Understand What Drives Cost
Kitchen remodeling costs vary widely based on size, materials, structural changes, and appliance choices. Setting a realistic budget and understanding where your money goes prevents surprise overruns and helps you prioritize.
What Affects Kitchen Remodeling Cost
- Cabinetry: Custom cabinets cost more than semi-custom or stock options but offer exact dimensions and finish flexibility.
- Countertops: Quartz, granite, marble, and butcher block carry different price points and maintenance requirements.
- Appliances: Professional-grade ranges, built-in refrigerators, and panel-ready dishwashers increase cost.
- Flooring: Tile, hardwood, luxury vinyl plank, and natural stone differ in material price, installation complexity, and longevity.
- Structural changes: Moving walls, relocating plumbing, adding windows, or removing load-bearing elements require engineering, permits, and additional labor.
- Lighting and electrical: Undercabinet lighting, pendant fixtures, additional outlets, and panel upgrades add cost but improve functionality.
How to Track Your Budget During the Project
Property ReVision clients use CoConstruct project management software to follow selections, budgets, schedules, progress, and project correspondence. You can select your desired material and see how that selection affects your budget instantly, reducing guesswork and last-minute compromises.
After you receive your free estimate, the proposal review includes a detailed proposal and a 3D rendering of the space so you understand exactly what you are purchasing before construction begins.
Step 3: Choose Your Materials and Finishes
Material decisions shape your kitchen's appearance, durability, and maintenance routine. Weighing aesthetics against daily use prevents regret.
Cabinetry
- Door style: Shaker, flat-panel, raised-panel, and glass-front doors establish visual tone.
- Finish: Painted cabinets offer unlimited color; stained wood highlights grain.
- Construction: Plywood boxes and dovetail drawers outlast particleboard and stapled joints.
- Storage accessories: Pullout shelves, lazy Susans, drawer dividers, and appliance garages reduce clutter.
Countertops
- Quartz: Engineered, non-porous, consistent color, low maintenance.
- Granite: Natural stone, each slab unique, requires periodic sealing.
- Marble: Elegant but porous; scratches and stains more easily.
- Butcher block: Warm, repairable, requires oiling, shows wear.
Backsplashes
- Subway tile: Classic, affordable, easy to clean.
- Mosaic: Adds texture and color but requires more grout maintenance.
- Slab: Continues countertop material up the wall for a seamless look.
Flooring
- Hardwood: Timeless but vulnerable to water damage near sinks and dishwashers.
- Tile: Durable and water-resistant; grout needs sealing.
- Luxury vinyl plank: Water-resistant, comfortable underfoot, budget-friendly.
Lighting
Layer three types: ambient (recessed or flush-mount ceiling fixtures), task (undercabinet LED strips for counters), and accent (pendants over an island or sink). Dimmer switches let you adjust light intensity for cooking, homework, or entertaining.
Step 4: Understand Permits and Code Requirements
Most kitchen remodels require permits when you move plumbing, upgrade electrical service, alter structure, or add square footage. Permit coordination protects you from code violations, failed inspections, and complications during resale or insurance claims.
Property ReVision manages the permitting process for applicable remodeling projects. The team prepares construction drawings, submits applications, schedules inspections, and addresses any corrections required by local building officials.
Step 5: Choose Between General Contractors and Design-Build Firms
You can hire a designer and a contractor separately, or work with a design-build firm that handles planning, design, permitting, and construction under one roof.
Design-Build Advantages
- Single point of accountability: One contract, one team, one schedule.
- Faster decisions: Designers and builders collaborate from day one, eliminating back-and-forth between separate companies.
- Clearer cost visibility: The team that designs your kitchen also prices and builds it, reducing surprises.
- Unified communication: You receive consistent updates from one project manager instead of coordinating multiple vendors.
Property ReVision presents an in-house team of designers, project managers, carpenters, and drafting and production staff, so every phase of your kitchen renovation stays coordinated.
Step 6: Plan for Disruption and Temporary Kitchen Arrangements
Kitchen remodeling is disruptive. Your home will have construction noise, dust barriers, limited water access, and workers moving in and out for several weeks.
How to Prepare
- Set up a temporary kitchen: Microwave, toaster oven, coffee maker, and mini-fridge in another room.
- Plan meals: Stock easy-to-prepare foods or budget for takeout.
- Protect adjacent rooms: Seal doorways with plastic sheeting to contain dust.
- Communicate with your household: Discuss daily schedules, noise tolerance, and backup plans for meals.
- Establish site rules: Decide which spaces workers can access, where tools are stored, and bathroom availability.
Your project manager leads the construction team and provides consistent updates so you know what to expect each day.
Step 7: Understand the Kitchen Remodeling Sequence
Remodeling follows a logical sequence. Skipping steps or reversing order causes delays, rework, and cost overruns.
Typical Kitchen Remodeling Process
- Demolition: Remove old cabinets, countertops, flooring, and fixtures.
- Rough-in work: Relocate or install plumbing, electrical, HVAC, and gas lines.
- Inspections: Building officials verify rough-in work meets code.
- Insulation and drywall: Close walls, tape, mud, and sand.
- Painting: Prime and paint walls and ceilings.
- Cabinet installation: Set base and wall cabinets, level and secure.
- Countertop template and installation: Fabricator measures after cabinets are installed, then cuts and installs countertops.
- Backsplash: Tile or slab installation after countertops are in place.
- Flooring: Install after cabinets to save material cost, or before for easier future cabinet replacement.
- Trim and finish carpentry: Install baseboards, crown molding, and cabinet hardware.
- Fixture and appliance installation: Plumber and electrician connect sink, faucet, dishwasher, range, and hood.
- Final inspection and walkthrough: Building official approves work; you review completed project with your team.
Property ReVision uses CoConstruct so clients can follow progress and schedule milestones in real time.
Step 8: Understand the Completion-Date Guarantee
A clear construction schedule helps you plan around the disruption of a kitchen renovation.
Completion-Date Guarantee
Once construction begins, Property ReVision establishes a completion date. If work continues beyond that agreed date, the company pays the homeowner $100 per day.
Step 9: Design for Long-Term Use and Resale Value
Trend-first kitchens can feel dated within five years. Designing for how you live, while keeping broad appeal in mind, protects your investment.
Timeless Design Choices
- Neutral cabinet colors: White, gray, navy, and natural wood age gracefully.
- Classic tile patterns: Subway, herringbone, and simple mosaics stay relevant.
- Quality over flash: Solid construction and durable materials outlast trendy finishes.
- Universal accessibility: Lever faucets, pullout shelves, and open floor space accommodate aging in place or future buyers with mobility needs.
When to Prioritize Personal Preference
If you plan to live in your home for a decade or more, design for your life. A dedicated coffee station, wine refrigerator, or oversized island may not appeal to every buyer, but the daily joy and functionality matter more than resale spreadsheets.
Step 10: What Happens After Your Kitchen Is Complete
Your remodel is finished when the final inspection passes, appliances work, and every cabinet drawer glides smoothly.
Final Walkthrough Checklist
- Cabinet doors and drawers open and close without binding.
- Countertops are level, seams are tight, and edges are smooth.
- Backsplash grout is sealed and clean.
- All outlets, switches, and lights function.
- Plumbing fixtures deliver water without leaks.
- Appliances are connected and operational.
- Flooring is clean, undamaged, and transitions are secure.
- Paint touch-ups are complete.
Warranty and Maintenance Guidance
Ask your remodeling team which parts of the work carry warranties, how long coverage lasts, and what regular maintenance is required. Granite may need annual sealing, wood floors should be cleaned with specific products, and grout benefits from periodic resealing.
Property ReVision provides post-project support so you know who to contact if an issue arises after completion.
Why Southeastern Wisconsin Homeowners Choose Design-Build Kitchen Remodeling
Homeowners in Southeastern Wisconsin planning a kitchen renovation want one accountable team for design and construction. They care about practical layouts, home value, budget visibility, schedule certainty, and frequent communication.
Property ReVision is a Waukesha-based full-service residential design-build remodeling firm founded in 2016 by Jason Schafer and Justin Bohler, engineers who built the company around careful planning, clearer communication, and a more dependable remodeling process.
The company has earned recognition including the 2026 BizTimes Future 50, the 2024 Inc. 5000, NARI Milwaukee Remodeler of the Year awards, Best of Houzz Service awards, and an Angi Super Service Award.
Ready to Start Your Kitchen Remodeling Project?
If you are planning a kitchen renovation in Southeastern Wisconsin, Property ReVision offers a free estimate to help you understand scope, budget, and timeline.
After the estimate, you will receive a detailed proposal and a 3D rendering of your new kitchen so you can see exactly what your investment will deliver before construction begins.
Contact Property ReVision at 414-436-9266, email projects@propertyrevision.com, or visit the showroom at 2212 E Moreland Boulevard, Suite 200, Waukesha, Wisconsin 53186.
Your kitchen should work as hard as you do. Let's plan a space that supports how you cook, gather, and live every day.